Professor Higgins:
♩♩♩♬♬♬♬♬♬♬♬♬♬♬
Why is thinking something women computers never do?
And why is logic never even tried?
Straightening up their hair hard drives is all they ever do.
Why don’t they straighten up the mess that’s inside?
(a mangled excerpt from) Why Can’t a Woman Be More Like a Man by Lerner and Loewe fr: My Fair Lady
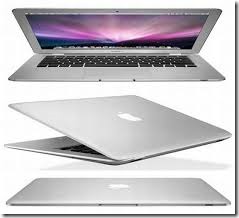
Look at these two things:
Don’t they look so neat and self-contained? So aesthetically pleasing?
Well, they can be an absolute mess inside.
A cute and snazzy package on the outside, a quagmire of bloat and chaos on the inside. I’d like to remedy this.
The Overview
This is the first part of a little series of imperatives for tidying up your computer and making a secure backup of all your data.
It will be about Cleaning, File Management, and the Backup itself.
N.B. Keep in mind that the steps below really do require the use of your computer’s “file manager”. For most, that will be Windows Explorer (or “File Explorer” in Windows 8) or the Finder on a Mac.
For Windows users, right-click on the Start Button  on the bottom left of your desktop screen.
You’ll get a little pop-up that let’s you select Windows Explorer.
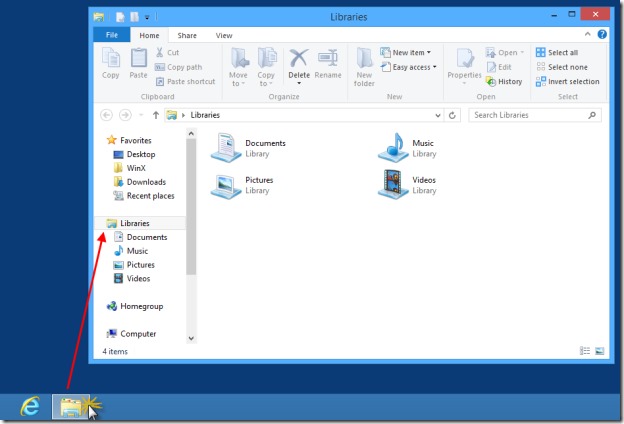
In Windows 8, it’s a little different, unless you’ve installed Classic Shell or some other program that gives you back your regular Start button. In Win 8, you have to get to your desktop and click on the folder icon on the bottom on your screen (the taskbar).
On the Mac, there is the Finder icon on the Dock, the strip of icons at the bottom of your desktop screen.
If this is all voodoo to you, let me know and I’ll do a separate post about it.
To continue:
As I look back over the BIG problems I’ve been called about last year, it seems that those which were catastrophic were all fixable if my client had made a back up.
There were some clients who lost EVERYTHING. No backup.
Even if your hard drive is toast or your computer is generally kaput, you can regain your sanity if you’ve made a back up. Computers can be replaced, your documents, pictures – anything personal – cannot.
Steps for making a good backup and having some peace of mind.
The Clean Up – Before you back up.
It just makes sense to thoroughly clean up your computer’s files before you do a backup. This is especially true if you’re transferring all your files to a new computer.
1. Organize Your Documents
For most Windows and Mac users, the place where everything is saved is called My Documents or Documents, respectively.
This where almost all your written documents, pictures, music, and videos are stored by default.
Recently, Windows has broken out the My Documents folder into “Libraries” with “Documents” to mean Word documents, Excel spreadsheets, pdf files and the like. There is also a dedicated folder for Music, Pictures and Videos.
To view these, open up your Windows Explorer (“File Explorer” in Windows 8).
You can make up your own folders and organize them any way that makes sense to you. Some way that you’ll remember.
Then, move similarly themed files into those folders. Drag them, copy and paste them – whatever you’re most comfortable with.
Now it should be like Ikea came to your house and made everything just so.
2. Pack away all those stray files!
Chances are, you have stray files on your Desktop (that’s the main screen) and they really ought to be tucked away somewhere sensible, such as your My Documents folder.
You may have picture files (jpg files etc) that have been scattered all over the place – a surprising number end up mixed with written documents. Stick those in your Pictures folder. Make a new folder under Pictures if you want to.
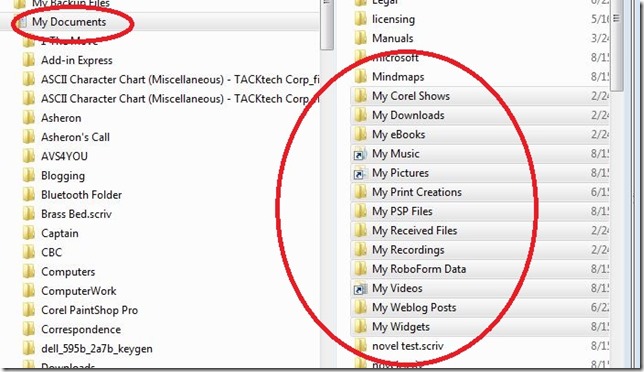
Long ago, I got fed up with the way Windows had all these “My” folders and started making my own.
If I look only at “My Documents” I get 13 (!) various “My …” folders:
Ridiculous!
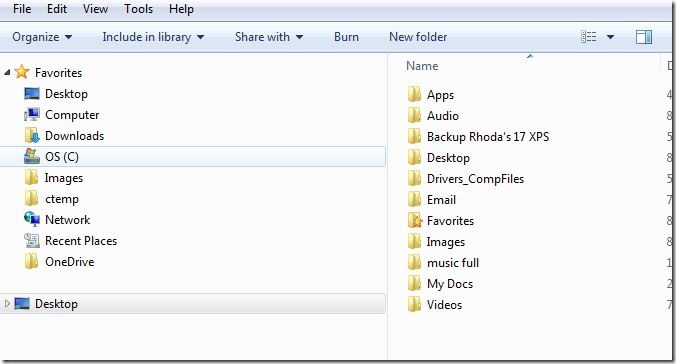
Instead I have something like:
All out in the open where I can get at things. (This is my idea of hanging out at Home Depot, folks).
Now, let’s get rid of the “dust bunnies”. There can be all kinds of files, folders, icons, shortcuts and downloaded programs cluttering up your Desktop. Check if you really need them and delete them if you don’t.
And move files to folders where you can find them again.
In other words, you don’t want a bunch of orphan files that aren’t filed away nicely in an easy to find folder. This will make it so much more easy down the road when we do the big backup. (Yes, it’s a new word now like “parenting”).
In Windows: Use Windows Explorer (now called File Explorer in Windows 8)
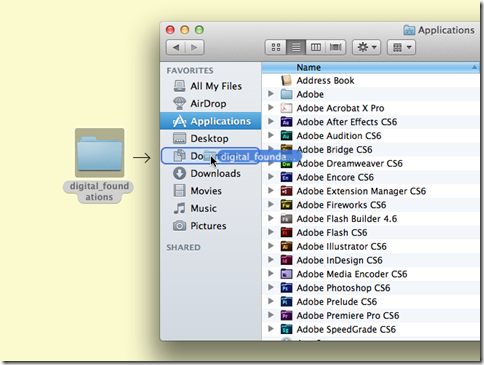
On a Mac: use The Finder:
3. Clean up your email (and don’t use your email program as a file manager – bad!)
This is the single greatest sin I see being committed. Whether you use the email program on your computer or a webmail service like Yahoo, Gmail, Hotmail, Outook.com or iCloud, people have a tendancy to use their email program as if it’s a separate hard drive. Often that’s the only place their contacts are stored. Very risky. If your webmail account gets hacked (and they get hacked all the time) there goes your whole address book. This should be saved to your hard drive.
Consider whether you need those HUGE attachments people have been sending you. If you really want to keep them, don’t they really belong in a real folder such as My Pictures? They do.
4. Find and dump any duplicate files. Enough said.
5. Get rid of temporary Internet files (including cleaning out your web browser’s cookies and history).
Each web browser has its own way to delete temporary files, whether it’s called “Clear Cache” (Mac), “Delete Browsing History” (Internet Explorer), “Clear Browsing Data” (Chrome) or “Clear Recent History” (Firefox).
As a supplement, you could always download and use the highly useful and free program SuperAntiSpyware (I know, I know) to clear out unwanted cookies and possible malware.
6. Take out the Trash . At the end of this long journey- empty out the already deleted stuff in your Recycle Bin, Trash folder, and Deleted Items in your email program
*7. Defragment your hard drive. *This is an optional step
If you’ve really gone to town and deleted Gigabytes worth of files, you may want to “defrag” your hard drive. This sticks all your data up nice and cozy against itself and makes the computer run better, and faster.
For Windows 7 users, go to your Start Button/All Programs/Accessories/System Tools/Disk Defragmenter. You can then just “Analyze” your hard drive to see if it needs to be defragged, or go straight to “Defragment”. This will take a while.
For Windows 8 users, if your using the “Metro” screen with all the tiles, just type “defrag” and you’ll see a pop-up list which includes “Defragment and optimize your drives”.
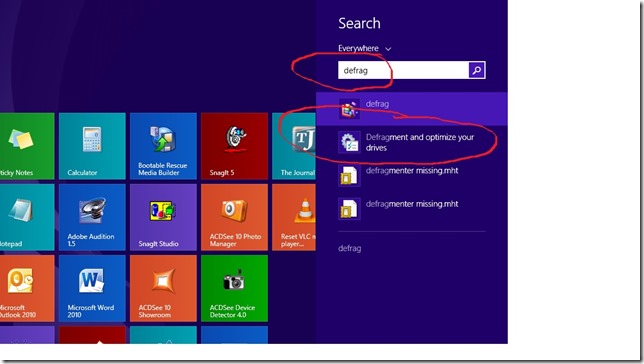
Click on that. Proceed as with Windows 7.
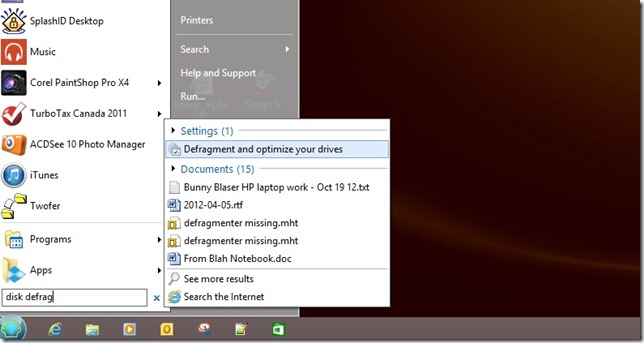
If you’re using a “shell” program on Windows 8, like Classic Shell or “Start8”, go to your Start button and type in “disk defrag” in the Search box. You’ll see something like this:
Click on “Defragment and optimize your drives”, and continue as above.
For Mac people, you’re in luck. You don’t need to defrag your hard drive. The Mac OSX operating system takes care of it by itself, like a self-cleaning oven.
As in cooking, if you take time to do a few little chores, computer maintenance will make life easier at the end of the day.
Cleaning as you go , you’ll end up with all your work done and no mess, no stress.
Then you’re going to be able to find your stuff fast and without stress. Believe me, it will take the fear out of a lot of using your computer (laptop, desktop, tablet, smart-phone).
In the next installment, we’ll get into making a good, solid, backup.


